
Registered Portal users can now display a wider selection of map data types from outside websites on Marine Planner using the Map Layer Import Tool. The improved tool also now allows for imported map layers to be saved in the MyPlanner tab along with bookmarks and drawings and shared with fellow members of Portal Groups.

The Map Layer Import Tool allows data from other marine portals as well as mapping applications dedicated to diverse topics such as coastal resilience, transportation, the environment, and the economy to be viewed along with the Portal’s thousands of maps showing ocean-centered data. The new import feature provides users with the ability to combine and compare diverse local, regional and global scale map data to reveal potential relationships, answer questions and tell stories.
Previously, the tool was only compatible with ArcGIS MapServers. It has since been expanded to allow ESRI FeatureServers, vector (i.e. geojson), vector tile (i.e. MapBox), and XYZ/WMT map services to be ingested.
The Map Layer Import Tool was designed for advanced users, but is accessible for anyone with basic computer skills. In most cases, users only need URLs and layer ID numbers for the external layers to create new map layers on the Portal’s Marine Planner application. If you’re unsure how to access this information from an online mapping site, contact the site administrator to ask whether their data are available in any of the formats listed above and, if so, what the URLs are.
How to Use the Tool
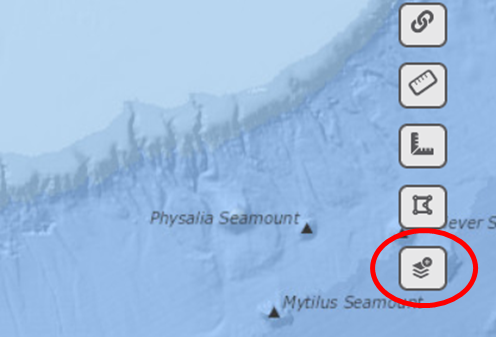
As seen to the right, a shortcut to launch the Map Layer Import Tool is located on the upper right side of the map, beneath the print, share and other buttons. The tool is visible and accessible only to registered Portal users who are logged in. (Click here to create an account. It's fast and easy!) Alternatively, logged-in users can also select the MyPlanner tab and click “+NEW” next to the User-Imported Layers dropdown to get started.
Next take the following steps:
- Enter the URL for the map layer in the field. Click the “Layer Source Type” dropdown menu and select the proper type (e.g. ArcRest, Vector) for your layer. [Unsure what type it is? Click the “i” icon at the top of the form for a summary of the layer types and how to distinguish them.] If you selected the ArcRest or ArcFeatureServer options, you will be prompted to provide the layer ID number for your map. If entering more than one, separate them with commas. Click “Next.”
- If the layer you're importing is password protected, check the box (if not, leave unchecked). You'll be prompted to type in the proper name/password after the next step.
- Type in a name for your map layer. Optionally, you may type in a description or notes about the map layer. Click “Save.”
Your new layer will now appear on Marine Planner and can be controlled (re-ordered, darkened/lightened, turned on/off, etc.) through the Active tab like any other Portal map layer. In many cases, a legend for the imported map layer will also be available.
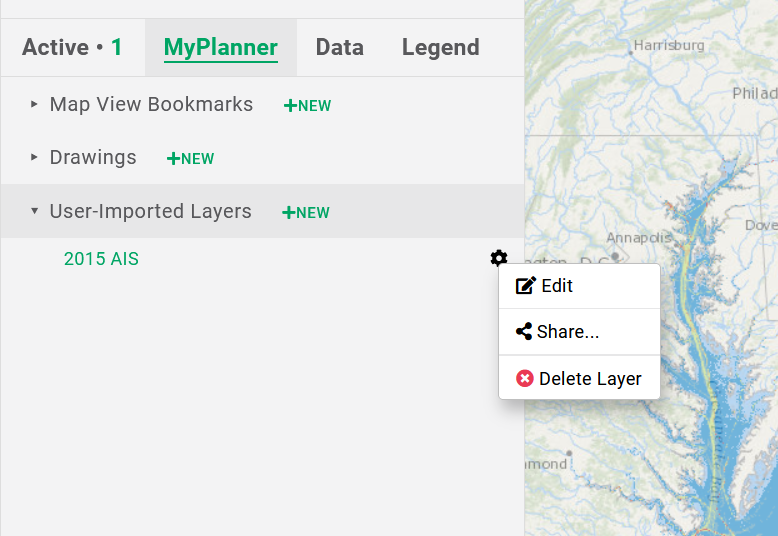
The map layer will also be saved automatically to your MyPlanner tab under the “User-Imported Layers” dropdown. There you can click on the gear icon to the right of the layer name (see image at right) to edit the map, share it to a Portal Group you’ve joined, or delete it.
This tool will continue to be expanded to accommodate additional map data types. Future possibilities under study include the ability to directly upload shape files; enter latitude/longitude coordinates to create map layers; import some styles for FeatureServer layers; and apply custom styles to FeatureServer, vector, and vector tile layers.
Questions or Ideas?
Have any questions or comments about this feature? How would you like to see it improved? Let us know at portal@midatlanticocean.org.